Some sort of spicy sauce to put on fish... that was my goal of the night. And after some squabbling with my computer, I found this little inspiration, minus that crappy tofu. As usual, measurements are out the window, but the one thing I can say is that I used boatloads more sugar than suggested.
Ingredients:
Minced garlic
Green onion
Toasted sesame seeds
Soy sauce
Sesame oil
Red pepper flakes
Brown sugar
Throw it all in a pan, I boiled it until it was a thicker consistency and then voila!
(apparently I forgot to take a picture, but basically, it looks like any teriyaki sauce)
I used it as a dipping sauce, but it would probably make a good glaze for baking, stir frying, or BBQing too! I love a good sauce and this turned out, again, better than all of those bottles I have bought.

Saturday, December 20, 2014

Monday, November 3, 2014
Menu Plan Monday 11/3-11/7
Did you know it's NaBloPoMo? I had no idea until about 15 minutes ago so I'm a little late to the party but that's not surprising. I also found out today was National Sandwich Day on my way to work, where I brought a salad for lunch. Clearly I need a better calendar system. Maybe there's a Google Calendar plug-in for every holiday ever invented? In fact, I Googled "national sandwich day" and randomly picked a result so I could see what tomorrow is. I was supes excited to see that tomorrow is allegedly National Chicken Lady Day and then immediately disappointed that the day has nothing to do with the Kids in the Hall character.
Thursday:
Friday:
So all that to say, here's my dinner menu plan for the week:
Monday:
Tuesday:
Turkey chili
Wednesday:
Takeout (class night)
Thursday:
leftovers
Friday:
Spaghetti bolognese, garden salad and garlic bread
Honestly, my shopping trip this week was poorly planned so while we have enough to eat through the week, I feel like I can do better.
Tuesday, October 7, 2014
Inspired to Share: Queso and Swayze Sauce
I just happened across this video and I want everything in it right now. I want to make it and eat it and maybe also swim in it. But I am not going to the store again today.
Friday, September 26, 2014
Sausage and artichoke soup
Breakfast sausage is so versitile! I love to use it in place of other meats when I am feeling creative, or when it is the only thing in the freezer. This started out as a soup based on two things I couldn't use up in the freezer, artichokes and breakfast sausage, but turned into a soup that I love making and eating. It is super easy and serves as an uncommon twist on vegetable soup.

Start with chopping a standard soup base of celery, carrot and onion. Then cook your sausage in your soup pot. I like my sausage to get pretty brown and crispy, then add the celery, carrot and onion to saute for a bit, and then remove the excess fat. Add your stock (if using canned artichokes, you may hold them out until a little later so they don't fall apart).

Add the spices of your choice (I like basil, parsley, allspice, Cavender's and pepper) and then bring to a boil then reduce to a simmer and cover. Simmer for 20 or so minutes, add your artichokes if you left them out, check your spices, and then simmer for another 15 minutes or so.

Ladle yourself up a bowl (maybe with some Fiesta cornbread!) and warm up with some awesome soup. The veggies are so tender and somehow the sausage seems to fit so much better than chicken or beef!
Start with chopping a standard soup base of celery, carrot and onion. Then cook your sausage in your soup pot. I like my sausage to get pretty brown and crispy, then add the celery, carrot and onion to saute for a bit, and then remove the excess fat. Add your stock (if using canned artichokes, you may hold them out until a little later so they don't fall apart).
Add the spices of your choice (I like basil, parsley, allspice, Cavender's and pepper) and then bring to a boil then reduce to a simmer and cover. Simmer for 20 or so minutes, add your artichokes if you left them out, check your spices, and then simmer for another 15 minutes or so.
Ladle yourself up a bowl (maybe with some Fiesta cornbread!) and warm up with some awesome soup. The veggies are so tender and somehow the sausage seems to fit so much better than chicken or beef!
Saturday, September 20, 2014
Fresh Fig & Caramelized Onion Flatbread
April since we posted? Man, we suck. Well, shit happened, but I am back. Cooking for the first time in 2 months and I wanted some damn figs! It's fall, so I found them and I only had to go to 2 stores to get them.
About a summer ago I was at the Plaza, bopping around, wasting time and money with a friend. The sun was blazing and there is really no shade in the middle of all of those expensive-ass stores so we decided to duck into the closest restaurant, which happened to be Seasons 52. They serve stuff that is "inspired by the season" which is hippy nonsense, but the food was delicious. I had a flatbread pizza with fig and arugula and a few other things I can't remember that inspired this recipe.
Flatbread dough (I used this recipe)
Toppings:
Fresh fig, thinly sliced
Baby Kale
Caramelized onions
Brie
Make the flatbread dough first, this is the long part. But you can freeze some of it for later. While the dough is rising or thawing (depending on your pre-planning), caramelize your onions in some butter, and slice your figs. Don't over-cook your onions because they will continue to cook in the oven.


I also didn't use a food processor or a mixer with a dough hook. I'm a rebel.
Preheat the oven to 450. If you have a pizza stone, good for you.
Roll out the dough on a piece of parchment (on a baking sheet if no stone) for easy transfer to the oven. I actually used my hands to pat it out, it didn't really require a roller.

Then I cut thin slices of room temp brie and placed them on the crust and covered them with about 1/2 the onions. Then I piled on the fig slices and kale, alternatingly... yes, this is a word... and then finished with the rest of the onions.

Pop the whole thing in the oven for 15-18 minutes, until the crust is a lovely brown.

Awesomeness! I was worried that the crust wouldn't crisp up under the weight of the toppings, but no problem at all.

You want to eat it right now don't you? I don't blame you. It is beautiful. It could have even used more of each of the toppings piled on. This crust was a little thick, maybe a roller would have helped...
About a summer ago I was at the Plaza, bopping around, wasting time and money with a friend. The sun was blazing and there is really no shade in the middle of all of those expensive-ass stores so we decided to duck into the closest restaurant, which happened to be Seasons 52. They serve stuff that is "inspired by the season" which is hippy nonsense, but the food was delicious. I had a flatbread pizza with fig and arugula and a few other things I can't remember that inspired this recipe.
Flatbread dough (I used this recipe)
Toppings:
Fresh fig, thinly sliced
Baby Kale
Caramelized onions
Brie
Make the flatbread dough first, this is the long part. But you can freeze some of it for later. While the dough is rising or thawing (depending on your pre-planning), caramelize your onions in some butter, and slice your figs. Don't over-cook your onions because they will continue to cook in the oven.
I didn't use exactly the ingredients called for, but whatev. It was still ok.
I also didn't use a food processor or a mixer with a dough hook. I'm a rebel.
Preheat the oven to 450. If you have a pizza stone, good for you.
Roll out the dough on a piece of parchment (on a baking sheet if no stone) for easy transfer to the oven. I actually used my hands to pat it out, it didn't really require a roller.
Then I cut thin slices of room temp brie and placed them on the crust and covered them with about 1/2 the onions. Then I piled on the fig slices and kale, alternatingly... yes, this is a word... and then finished with the rest of the onions.
Pop the whole thing in the oven for 15-18 minutes, until the crust is a lovely brown.
Awesomeness! I was worried that the crust wouldn't crisp up under the weight of the toppings, but no problem at all.
You want to eat it right now don't you? I don't blame you. It is beautiful. It could have even used more of each of the toppings piled on. This crust was a little thick, maybe a roller would have helped...
Tuesday, April 29, 2014
Fiesta cornbread
Cornbread is about the only bread that I have successfully made taste good when I cook it. Also, it is probably the least labor and tool intensive of any bread I have made. Therefore, I have many cornbread variations, both savory and sweet. This savory version is cheesy and peppery and fun and the most delicious thing you will ever eat. EVER!

Ingredients:
2 tbsp butter
1/4 c chopped anaheim pepper
1/4 c chopped onion
1 tbsp chopped pimento
Jiffy corn muffin mix
1 egg
2/3 c milk
1/2 c roasted corn
1 c shredded cheese
Preheat the oven to 400.
Melt the butter in a small pan and saute the pepper, onion and pimento until softened. It seems like a lot of butter, but there is a creaminess that you want to achieve in the final product and this is an aid. In a medium bowl, combine the Jiffy mix, egg and milk (I use about twice the milk called for in the original Jiffy recipe because the other ingredients suck up the moisture). Add the pepper mixture and corn to the bowl and combine. Then add the cheese and combine.

Grease a loaf pan, and then pour the mixture in the pan, and pop in the oven for 25-30 minutes. Test with a toothpick, make sure it comes out clean.
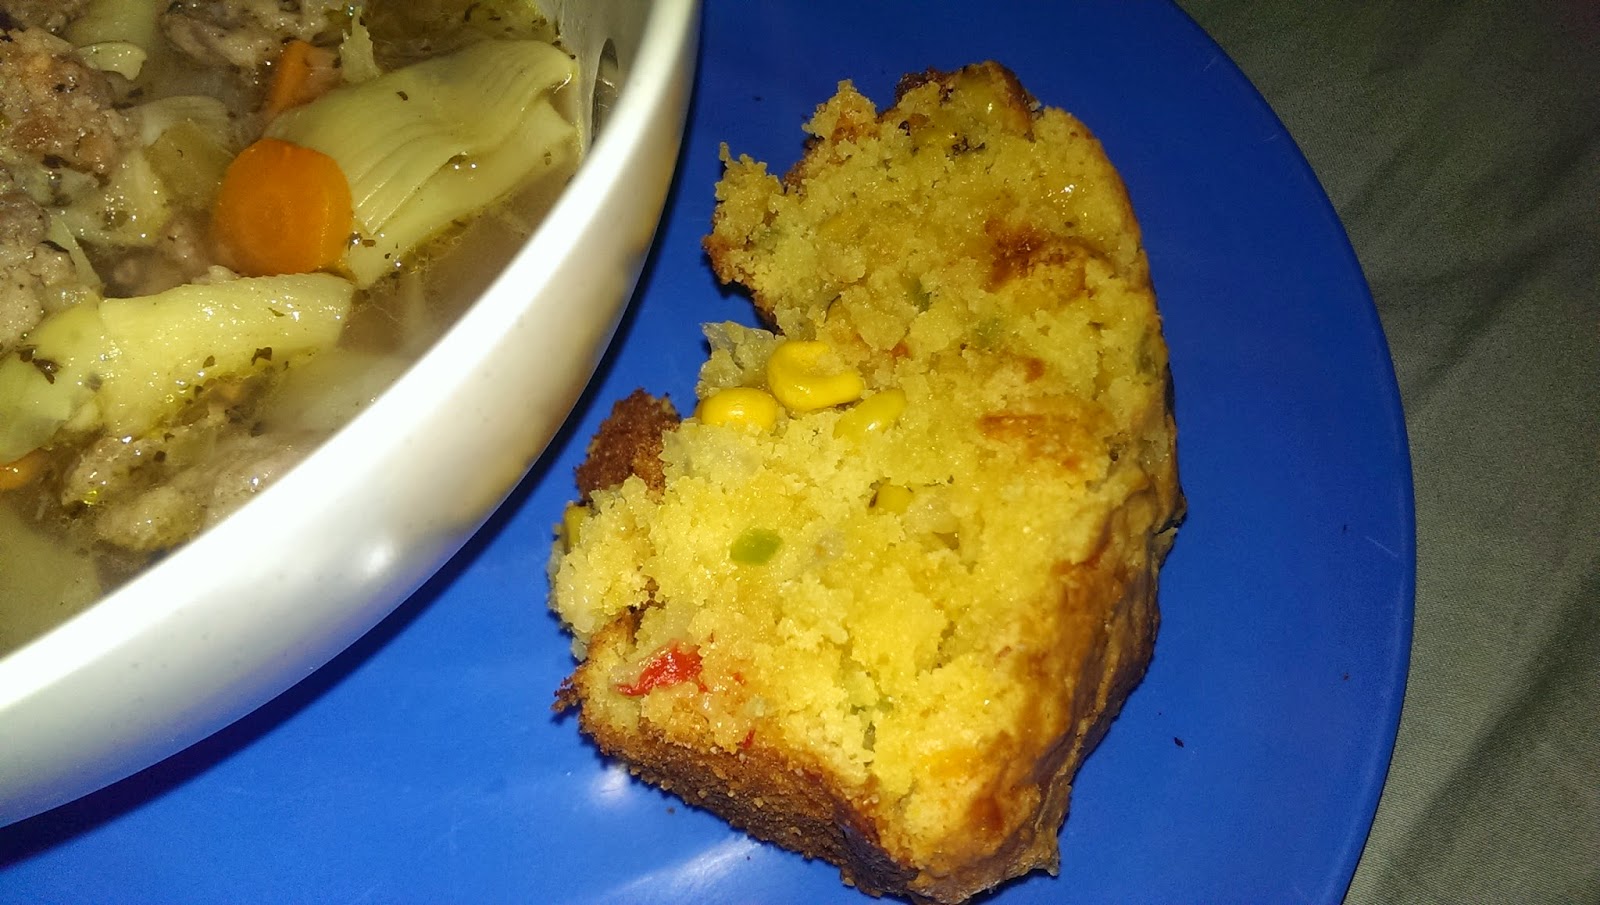
Enjoy with pretty much anything! Soup, enchiladas, pork roast, or just eat the whole pan with a spoon secretly while hiding from your family... IT IS THAT GOOD! It's like the inverse of a fruit pie, but better! Hang on... I gotta go eat some more... YYYYUUUUMMMMMMM!

Ingredients:
2 tbsp butter
1/4 c chopped anaheim pepper
1/4 c chopped onion
1 tbsp chopped pimento
Jiffy corn muffin mix
1 egg
2/3 c milk
1/2 c roasted corn
1 c shredded cheese
Preheat the oven to 400.
Melt the butter in a small pan and saute the pepper, onion and pimento until softened. It seems like a lot of butter, but there is a creaminess that you want to achieve in the final product and this is an aid. In a medium bowl, combine the Jiffy mix, egg and milk (I use about twice the milk called for in the original Jiffy recipe because the other ingredients suck up the moisture). Add the pepper mixture and corn to the bowl and combine. Then add the cheese and combine.
Grease a loaf pan, and then pour the mixture in the pan, and pop in the oven for 25-30 minutes. Test with a toothpick, make sure it comes out clean.
Enjoy with pretty much anything! Soup, enchiladas, pork roast, or just eat the whole pan with a spoon secretly while hiding from your family... IT IS THAT GOOD! It's like the inverse of a fruit pie, but better! Hang on... I gotta go eat some more... YYYYUUUUMMMMMMM!
Sunday, April 27, 2014
Preserved Meyer Lemons
I picked up a bag of Meyer lemons the other day at the grocery store because they looked absolutely beautiful and I couldn't pass them up. I had never eaten one raw, and I highly recommend it... if you enjoy lemons otherwise. I love eating wedges of lemon and these are just a little sweeter version. My bag had about 7 of them so I wanted to find a couple other uses then just eating them straight. I did some Googling and found some articles on preserving lemons and how easy it was, so I decided to give it a shot.

Get yourself a jar that seals well, some kosher salt and your lemons. Cut a bit off each end of the lemon and then quarter them. Put a little salt in the bottom of the jar and cover the wedges in the salt as well. Cram those suckers in there, so much so that some of the juice squeezes out. Make sure that when the jar is full that there is enough juice to cover all the lemons, and add more juice if not.

Seal it up and label the date you crammed them, because now you have to wait 3 whole weeks to use them! Leave them on the counter for a couple days and then put them in the fridge for the rest of the 3 weeks. Flip the jar upside down every once in a while.
I read several places that you are supposed to discard the flesh and then only use the rind once they are preserved, but I say, hey, need salt and lemons in a recipe, use that part. After those 3 weeks, lemon it up to your hearts content! I used some to make a fish tagine that was... interesting, though I don't think the interestingness was the fault of the lemons.
Get yourself a jar that seals well, some kosher salt and your lemons. Cut a bit off each end of the lemon and then quarter them. Put a little salt in the bottom of the jar and cover the wedges in the salt as well. Cram those suckers in there, so much so that some of the juice squeezes out. Make sure that when the jar is full that there is enough juice to cover all the lemons, and add more juice if not.
Seal it up and label the date you crammed them, because now you have to wait 3 whole weeks to use them! Leave them on the counter for a couple days and then put them in the fridge for the rest of the 3 weeks. Flip the jar upside down every once in a while.
I read several places that you are supposed to discard the flesh and then only use the rind once they are preserved, but I say, hey, need salt and lemons in a recipe, use that part. After those 3 weeks, lemon it up to your hearts content! I used some to make a fish tagine that was... interesting, though I don't think the interestingness was the fault of the lemons.
Thursday, March 6, 2014
Chicken Enchilada Casserole
Dave joked to me the other day that my body content is 80% sour cream. Which is probably true considering how much of that deliciousness I was eating with my breakfast when he said. So much, in fact that I almost reached for his ramekin of sour cream after I finished mine.
So without futher ado,

There's no real point to this anecdote other than a) I love sour cream and b) this recipe uses it.
This recipe is slightly adapted from Iowa Girl Eats' Lazy Girl's Chicken Enchilada Casserole but I made a few modifications. First, I made the enchilada sauce. It's not turribly difficult to make and I wanted to try this tomato-less sauce. The sauce recipe I used is listed below and I used the full 2 cups it yielded 'cuz we like things nice and saucy!
So without futher ado,
Chicken Enchilada Casserole (slightly adapted from Iowa Girl Eats)
1 lb chicken breasts, cut into bite-sized pieces
salt
pepper
1 cup sour cream
1 batch enchilada sauce (below) or 2 cups prepared sauce
1 cup frozen corn, thawed
4 oz can of diced chiles
8ish corn tortillas, cut into strips
1 cup shredded cheese
salsa, for serving
green onions, for serving
extra sour cream, for serving
Preheat oven to 350. Spray a 9x13 baking dish with non-stick spray and set aside. Season chicken with salt and pepper and brown in a well-oiled skillet. Remove from heat. Mix sour cream, enchilada sauce, corn and chiles in a large bowl. Add chicken and tortilla strips to the bowl and mix well. Pour mix into baking dish and top with cheese. Bake for 20 minutes. After allowing to cool slightly, serve garnished with salsa, green onions and sour cream.
Enchilada Sauce (slightly adapted from Gimme Some Oven)
1/2 onion, minced
2 tbsp canola oil
2 tbsp flour
3 tbsp chili powder
1 tbsp Chipotle Southwest seasoning
1/2 tsp garlic powder
1/2 tsp cumin
1/4 tsp oregano
2 cups chicken broth
Put a pan over medium heat. Add minced onion and cook until slightly softened. Add oil and flour and stir until slightly browned. Add seasonings and stir well. Slowly add chicken broth and stir well while it thickens, about 10 minutes. Remove from heat.
Monday, March 3, 2014
Meal Plan Monday (3/3-3/8)
You might've noticed some recipes move from week to week. This is my way of using up things in our fridge before they go bad if we veer from the menu plan. Which happens quite a bit.
When I was planning this menu yesterday morning, it was 60 degrees and humid. Today it's 25 and we've had an ice storm overnight so that may change the way we eat this week. We'll see...
Monday
Lunch: Tomato soup (canned)
Dinner: Chicken Noodle soup (homemade)
Tuesday
Lunch: Chicken Noodle soup
Dinner: Jet's Pizza!
Wednesday
Lunch: Arnold's!! (only the best soul food in Nashville)
Dinner: Pork loin rice bowls
Thursday
Lunch: rice bowls
Dinner: Honey Sriracha chicken thighs and roasted sweet potatoes
Friday
Lunch: TBD
Dinner: Butter chicken and curry roasted broccoli
Saturday
Lunch: Sandwiches
Dinner: Pesto tortellini
When I was planning this menu yesterday morning, it was 60 degrees and humid. Today it's 25 and we've had an ice storm overnight so that may change the way we eat this week. We'll see...
Monday
Lunch: Tomato soup (canned)
Dinner: Chicken Noodle soup (homemade)
Tuesday
Lunch: Chicken Noodle soup
Dinner: Jet's Pizza!
Wednesday
Lunch: Arnold's!! (only the best soul food in Nashville)
Dinner: Pork loin rice bowls
Thursday
Lunch: rice bowls
Dinner: Honey Sriracha chicken thighs and roasted sweet potatoes
Friday
Lunch: TBD
Dinner: Butter chicken and curry roasted broccoli
Saturday
Lunch: Sandwiches
Dinner: Pesto tortellini
Monday, February 24, 2014
Meal Plan Monday (2/24-3/1)
I reviewed my meal plan from last week and while it accurately reflects how my meal planning goes, it doesn't reflect what we actually ate. I think meal planning is important for grocery shopping and it's nice to not have to decide what to eat when you're already hungry. But there's no point in feeling bad if you don't adhere to the plan. At least I don't. So here's my plan for this week. I'm including lunches this week because I feel like that's a place where I could step up on planning. And I'm struggling with a lunch plan so here's hoping we have enough leftovers not to starve!
Monday
Lunch: Chicken, veggie and couscous bowl
Dinner: Beef stroganoff with egg noodles and roasted asparagus
Tuesday
Lunch: leftover stroganoff
Dinner: Takeout
Wednesday
Lunch:
Dinner: Pork loin rice bowls
Thursday
Lunch: with colleagues
Dinner: Penne with bleu cheese sauce
Friday
Lunch:
Dinner: Creamy tomato basil soup with crostini
Saturday
Lunch:
Dinner: Pesto and chicken white pizza
Monday
Lunch: Chicken, veggie and couscous bowl
Dinner: Beef stroganoff with egg noodles and roasted asparagus
Tuesday
Lunch: leftover stroganoff
Dinner: Takeout
Wednesday
Lunch:
Dinner: Pork loin rice bowls
Thursday
Lunch: with colleagues
Dinner: Penne with bleu cheese sauce
Friday
Lunch:
Dinner: Creamy tomato basil soup with crostini
Saturday
Lunch:
Dinner: Pesto and chicken white pizza
Tuesday, February 18, 2014
Meal Plan "Monday"
I try to make a meal plan every week that will guide my grocery shopping. Most weeks I do okay, which is fine with me. Cooking after work seems like a good idea when it's Sunday morning, I have a giant mug of tea and all the time in the world to flip through cookbooks and food blogs for inspiration. I'm going to start posting my meal plans in hopes that I will be further motivated to cook. Let's see how it goes?
Dinner Plan 2/17-2/22
Monday: One Pan Coconut Shrimp bowls
Tuesday: takeout (class on Tuesday night = no cooking)
Wednesday: Roasted chicken breast with couscous and spinach/arugula salad
Thursday: Baked potatoes with broccoli cheese soup
Friday: Dinner and a movie?
Saturday: Beef stroganoff
Dinner Plan 2/17-2/22
Monday: One Pan Coconut Shrimp bowls
Tuesday: takeout (class on Tuesday night = no cooking)
Wednesday: Roasted chicken breast with couscous and spinach/arugula salad
Thursday: Baked potatoes with broccoli cheese soup
Friday: Dinner and a movie?
Saturday: Beef stroganoff
Wednesday, February 5, 2014
Shrimp and Cucumber Brunch Salad
Brunch is my JAM! A decadent brunch buffet is one of the best treats I can think of. I happen to be in love with many of the dishes on the Paulo and Bill's brunch buffet, but one of my favorites is a shrimp and cucumber salad that they don't even list on the website. Apparently they don't think as highly of it as I do. This is my spruced up version.
Ingredients:
Shrimp (boiled until just pink and cooked through, then ice bath 'em)
Cucumber, peeled and seeded
Tomato, seeded
Avocado
Yellow bell pepper, roasted and cooled
Baby greens
Dressing:
4-5 tbsp Olive oil
2-3 tbsp Red wine vinegar
1 tsp Honey
1 clove Roasted minced garlic
1/4 tsp Onion salt
1/2 tsp Garlic salt
1/4 tsp Oregano
1/4 tsp Thyme
1/4 tsp Basil
1/2 tsp Parsley
1/4 tsp Black pepper
Pinch Red pepper flakes

For the dressing, combine all of the ingredients in a lidded container, and shake it like crazy. Then chop/cube all of the salad ingredients into about 1/2 inch - 1 inch pieces. I like to chop the greens too so that it mixes in well. Combine everything in a large bowl and coat it in the dressing. Cover and put it in the fridge for about 2 hours (enough time to get really cold and marinate), and then serve cold (in a beautiful hand-painted bowl from Algeria that you got as a Christmas gift).

And I tell you... GOOD GERTY, THIS IS AMAZING. I want to eat this every day. It is crisp and tangy and fresh and freaking awesome. The avocados limit the amount of time that leftovers will stay good, but that just means you have to eat it all faster.
Ingredients:
Shrimp (boiled until just pink and cooked through, then ice bath 'em)
Cucumber, peeled and seeded
Tomato, seeded
Avocado
Yellow bell pepper, roasted and cooled
Baby greens
Dressing:
4-5 tbsp Olive oil
2-3 tbsp Red wine vinegar
1 tsp Honey
1 clove Roasted minced garlic
1/4 tsp Onion salt
1/2 tsp Garlic salt
1/4 tsp Oregano
1/4 tsp Thyme
1/4 tsp Basil
1/2 tsp Parsley
1/4 tsp Black pepper
Pinch Red pepper flakes
For the dressing, combine all of the ingredients in a lidded container, and shake it like crazy. Then chop/cube all of the salad ingredients into about 1/2 inch - 1 inch pieces. I like to chop the greens too so that it mixes in well. Combine everything in a large bowl and coat it in the dressing. Cover and put it in the fridge for about 2 hours (enough time to get really cold and marinate), and then serve cold (in a beautiful hand-painted bowl from Algeria that you got as a Christmas gift).
And I tell you... GOOD GERTY, THIS IS AMAZING. I want to eat this every day. It is crisp and tangy and fresh and freaking awesome. The avocados limit the amount of time that leftovers will stay good, but that just means you have to eat it all faster.
Tuesday, January 28, 2014
Wilted Spinach
Wilted spinach can be totally delicious... as long as you don't buy it frozen... and as long as you mix some interesting stuff into it. My current favorite is a combination of dried fruit and nuts. If you want to get real crazy you can toss in some cheese too. Basically, choose something from column A, B and C.
Column A Column B Column C
Currants Pecans Parmesan
Golden raisins Slivered almonds Feta
Cranberries Walnuts Blue
Dates Pine nuts
Apricots Sunflower seeds
What I like to do is saute a giant wad of spinach in a pan with a liiiiiiiittle bit of olive oil and wilt the shit out of it. Like to 1/5 its original volume. You might like it crunchier, tis your preference.
This...

Turns into this...

I actually would have liked to cook it down even a bit more, it was a little watery for my taste.
Then I make a little hole in the middle and toast the nuts in the pan for a few minutes. You can do this in different pans or do one, remove it and do the other, but my way is the nice and lazy way.

Then toss in the fruit and or cheese, toss it all around, and have yourself a flavorful little side dish!

I went cheeseless because I served it with another cheesy side dish along with my pork chop. Side note, I used this method to cook the chops and GAAADDAYAM they were delicious.
This...
Turns into this...
I actually would have liked to cook it down even a bit more, it was a little watery for my taste.
Then I make a little hole in the middle and toast the nuts in the pan for a few minutes. You can do this in different pans or do one, remove it and do the other, but my way is the nice and lazy way.
Then toss in the fruit and or cheese, toss it all around, and have yourself a flavorful little side dish!
I went cheeseless because I served it with another cheesy side dish along with my pork chop. Side note, I used this method to cook the chops and GAAADDAYAM they were delicious.
Monday, January 13, 2014
Chocolate Chip Currant Low-carb Cookie Cake Thing
I decided to try to make a low-carb baked good that didn't taste like shit, or more specifically, weird spongy eggy shit. I tried a couple recipes that used just almond flour or coconut flour and they required so many eggs that eggs were all I could taste (and I hate eggs). I was searching the fancy-pants aisles at the grocery store and came across something called Low-Carb (or crab as I just type... hahahahaha low-crab baking!... heh) Baking Mix which had a bunch of different expensive ingredients mixed together.
I adapted a traditional choco-chip cookie recipe to incorporate the baking mix and xylitol, which is a sugar substitute that I actually think tastes good. It is made from birch trees (if you get the right brand, some are made from corn) and has a very low glycemic index which makes it better for diabetics.

I decided to include a little molasses since most cookie recipes call for brown sugar too, and I wanted to stick with the xylitol. I am not sure if it was necessary, but it made the batter look the right color.

I also went high on the salt to try to balance out the extra-sweet taste of the xylitol. I was a bit worried when I tasted the batter that it would be too sweet, but the finished product was definitely not overly sweet.

They didn't come out like cookies exactly, so much as like a dense cookie flavored cake, which all in all, I think is a win. The baking mix is very "whole grain" in flavor and texture, so it is kind of muffin-y in that sense. Still, I like it, and it is worth eating. Although the baking mix is expensive and so is the xylitol, so at some point it may be worth just making regular baked goods and eating smaller portions of them.
Post script... these are really growing on me. Two days later I am loving them! They are so different than anything else I have made, and the combo of chocolate and currants is just delightful.

Ingredients:
2 c Red Mill Low-Carb Baking Mix
1 tsp baking soda
2 tsp salt
1 c butter
1 c xylitol
1 tsp molasses
1 tsp vanilla
2 eggs
chocolate chips to taste
currants to taste
Preheat over to 375 degrees. Grease a large pan. Beat butter, sugar, molasses and vanilla in a large bowl, then beat in each egg. Gradually mix in baking mix, baking soda and salt. Stir in chocolate chips and currants. Spread into pan, bake 20 minutes.
I adapted a traditional choco-chip cookie recipe to incorporate the baking mix and xylitol, which is a sugar substitute that I actually think tastes good. It is made from birch trees (if you get the right brand, some are made from corn) and has a very low glycemic index which makes it better for diabetics.

I decided to include a little molasses since most cookie recipes call for brown sugar too, and I wanted to stick with the xylitol. I am not sure if it was necessary, but it made the batter look the right color.

I also went high on the salt to try to balance out the extra-sweet taste of the xylitol. I was a bit worried when I tasted the batter that it would be too sweet, but the finished product was definitely not overly sweet.

They didn't come out like cookies exactly, so much as like a dense cookie flavored cake, which all in all, I think is a win. The baking mix is very "whole grain" in flavor and texture, so it is kind of muffin-y in that sense. Still, I like it, and it is worth eating. Although the baking mix is expensive and so is the xylitol, so at some point it may be worth just making regular baked goods and eating smaller portions of them.
Post script... these are really growing on me. Two days later I am loving them! They are so different than anything else I have made, and the combo of chocolate and currants is just delightful.

Ingredients:
2 c Red Mill Low-Carb Baking Mix
1 tsp baking soda
2 tsp salt
1 c butter
1 c xylitol
1 tsp molasses
1 tsp vanilla
2 eggs
chocolate chips to taste
currants to taste
Preheat over to 375 degrees. Grease a large pan. Beat butter, sugar, molasses and vanilla in a large bowl, then beat in each egg. Gradually mix in baking mix, baking soda and salt. Stir in chocolate chips and currants. Spread into pan, bake 20 minutes.
Monday, January 6, 2014
Chicken Tortilla Soup
Dave came back from our Thanksgiving trip home with a cold and when asked what kind of soup he wanted, he told me "chicken tortilla soup but no tomatoes". I did some Googling and voila! Pioneer Woman had a chicken tortilla soup that sounded delicious though I had to do some tweaking because Dave later informed me he didn't want beans in it either. Which I later found out was good because we'd eaten all the canned beans we usually keep stocked. You'll notice I added tomato paste to the soup. First of all, I asked Dave if it would hurt his feelings if I added the paste and he allowed it. It doesn't add a tomato-y flavor but it adds a depth that worked well with the spices.
This tasty soup was warm and filling and I wanted to make it again because we ate it rather quickly. I haven't made it again yet but we still have some corn tortillas left so I'll probably make it again soon.

Ingredients:
2 whole boneless skinless chicken breasts
2 tbsp olive oil
1 1/2 tsp cumin
1 tsp chili powder
1/2 tsp garlic powder
1/2 tsp salt
1 onion, diced
6 sweet mini peppers, diced (could use 1 bell pepper instead)
3 cloves garlic
4oz can diced green chiles
4 14 oz cans chicken broth
1 cup frozen corn, thawed
2 tbsp tomato paste
4 corn tortillas cut into strips
avocado
sour cream
cilantro
shredded cheese
Preheat oven to 375. Mix together cumin, chili powder, garlic powder and salt in a small ramekin. Drizzle chicken breasts with about 1 tablespoon olive oil and enough seasoning mix to coat both sides. Place seasoned breasts in a glass dish and roast about 20 minutes, until chicken is cooked through.
While the chicken is roasting, drizzle about 1 tablespoon olive oil in a pot over medium heat. Saute onion and bell peppers a couple of minutes, until they start to soften. Sprinkle with remaining spice mix and stir until veggies are well coated. Add garlic and saute until fragrant, about 1 minute. Add the green chiles and chicken broth and bring to a simmer. Let simmer while your chicken cooks.
Let chicken rest about 5 minutes after removing from oven. Cut into pieces and add to soup. Simmer about 5 minutes. Add corn and tomato paste. While flavors are melding, slice up your tortillas and cut up avocado. Place a small handful of tortilla strips to your serving bowl, ladle soup over it and garnish with avocado, sour cream, cilantro and shredded cheese. Then eat up!
Adapted from The Pioneer Woman
This tasty soup was warm and filling and I wanted to make it again because we ate it rather quickly. I haven't made it again yet but we still have some corn tortillas left so I'll probably make it again soon.

Ingredients:
2 whole boneless skinless chicken breasts
2 tbsp olive oil
1 1/2 tsp cumin
1 tsp chili powder
1/2 tsp garlic powder
1/2 tsp salt
1 onion, diced
6 sweet mini peppers, diced (could use 1 bell pepper instead)
3 cloves garlic
4oz can diced green chiles
4 14 oz cans chicken broth
1 cup frozen corn, thawed
2 tbsp tomato paste
4 corn tortillas cut into strips
avocado
sour cream
cilantro
shredded cheese
Preheat oven to 375. Mix together cumin, chili powder, garlic powder and salt in a small ramekin. Drizzle chicken breasts with about 1 tablespoon olive oil and enough seasoning mix to coat both sides. Place seasoned breasts in a glass dish and roast about 20 minutes, until chicken is cooked through.
While the chicken is roasting, drizzle about 1 tablespoon olive oil in a pot over medium heat. Saute onion and bell peppers a couple of minutes, until they start to soften. Sprinkle with remaining spice mix and stir until veggies are well coated. Add garlic and saute until fragrant, about 1 minute. Add the green chiles and chicken broth and bring to a simmer. Let simmer while your chicken cooks.
Let chicken rest about 5 minutes after removing from oven. Cut into pieces and add to soup. Simmer about 5 minutes. Add corn and tomato paste. While flavors are melding, slice up your tortillas and cut up avocado. Place a small handful of tortilla strips to your serving bowl, ladle soup over it and garnish with avocado, sour cream, cilantro and shredded cheese. Then eat up!
Adapted from The Pioneer Woman
Saturday, December 14, 2013
Leeks and Mushrooms
Martha really knows her stuff. I do not have near enough free time to be Martha Stewart, but whenever I use one of her recipes or techniques or whatever, it is always pretty damn awesome.


I bought some leeks at Trader Joe's when I was in there the other day because they looked good even though I didn't have a plan for them. They were nice big ones and were pre-cleaned without the giant extra green part that you can't eat. When I had a free night to cook them I looked around for a recipe and Martha had a nice simple one here. It looks really simple, and you think, eh, how special could it be, but I am telling you, this was awesome. Easy to make, and I didn't even include the parmesan because it was so delicious without it (and I was so hungry I forgot it)!

Ingredients (sweetened with some Taye Diggs in the background):
Leeks
Mushrooms (I used baby bellas)
Olive oil
Salt
Pepper
That is it! And guess what, toss it all together and saute it until carmelized. That is also it!

Martha said to put in the mushrooms first and do some fancy stuff, but I just threw it all in together and it was fabulous. That way the mushrooms still had a little firmness to them when they leeks were good and browned. I think I deglazed the pan with some water, maybe a 1/3 cup; if you like white wine, that would be good too, but I hate white wine.

Plate it and gobble it! I truly looked forward to eating the leftovers. That is how good this was. I love finding a new (to me) vegetable side dish that is easy to recreate.
Monday, December 9, 2013
Spinach and Artichoke Wonderpot
I've been seeing the wonderpot pop up on Pinterest and Facebook. To digress a bit, is anyone else a bit annoyed by people sharing recipes on Facebook? I don't know why it bothers me but it does. Anyhoodle, the wonderpot seems like a genius idea. Throw pasta and sauce fixin's in a large pot and let it do its thang. Easy peasy, right? I made this for dinner and it was solidly okay. I asked Dave to rate it and he gave it a B+. Which is to say that we both ate it but weren't terribly impressed with it. Don't get me wrong, it's not bad. It just didn't earn rave reviews. I may still play with it and tweak it because it has potential though.

Ingredients:
1/2 onion, sliced
1 cup frozen artichoke hearts, thawed
4 cloves garlic, minced
2 tbsp olive oil
5 cups chicken broth
12 oz box of fettucine
1 tsp dried oregano
1 tsp dried thyme
salt
pepper
5 oz frozen spinach (about half a bag)
cooked bacon, for garnish
parmesan
Put sliced onion, artichoke hearts, garlic, olive oil and chicken broth in a large pot. Break the fettucine in half (I did this in batches because my puny arms couldn't break the entire boxful in one stack) and add it, your dried spices and salt and pepper to the pot and stir well. Bring to a rolling boil and cook for 10-15 minutes, until pasta is cooked through. Stir every couple of minutes to make sure pasta doesn't stick. Once the liquid has mostly absorbed, dish up and top with crumbled bacon and grated parm.
Adapted from Budget Bytes

Ingredients:
1/2 onion, sliced
1 cup frozen artichoke hearts, thawed
4 cloves garlic, minced
2 tbsp olive oil
5 cups chicken broth
12 oz box of fettucine
1 tsp dried oregano
1 tsp dried thyme
salt
pepper
5 oz frozen spinach (about half a bag)
cooked bacon, for garnish
parmesan
Put sliced onion, artichoke hearts, garlic, olive oil and chicken broth in a large pot. Break the fettucine in half (I did this in batches because my puny arms couldn't break the entire boxful in one stack) and add it, your dried spices and salt and pepper to the pot and stir well. Bring to a rolling boil and cook for 10-15 minutes, until pasta is cooked through. Stir every couple of minutes to make sure pasta doesn't stick. Once the liquid has mostly absorbed, dish up and top with crumbled bacon and grated parm.
Adapted from Budget Bytes
Wednesday, October 23, 2013
Banana pecan muffins
I believe there are fewer issues more divisive than whether you like nuts in your food. Allergies aside, people have very strong feelings about nuts versus no nuts. I'm firmly in favor of nuts in everything and I don't care who knows it! Dave, on the other hand, is less fond of them. He didn't seem to mind the pecans in these muffins so I call that a win.
I bought a bunch of bananas intending to make smoothies but then I got lazy during the week and the bananas were turning that lovely shade that signifies they should be baked with rather than eaten plain. I like my bananas slightly underripe so the thought of an overly ripe banana as a snack is slightly upsetting.
These muffins were tasty and only slightly adapted from Tyler Florence's recipe. I made half a batch and they fit perfectly in my mini muffin pan.

Ingredients:
1 cup all-purpose flour
3/4 tsp baking soda
pinch salt
2 overripe bananas
1/2 cup brown sugar
1 1/4 sticks butter melted and cooled
1 egg
1 tsp vanilla extract
1/2 cup pecans, chopped
Preheat your oven to 375 and spray the ish out of your muffin pan with cooking spray.
Mash your bananas and combine with sugar. Beat vigorously until well combined. Add the butter, egg and vanilla and beat again. Mix in flour, baking soda and salt until just combined. Fold in the nuts with a spatula. Scoop your batter into muffin cups and bake for 12ish minutes, until golden brown.
Adapted from Tyler Florence's Banana Nut Muffins
I bought a bunch of bananas intending to make smoothies but then I got lazy during the week and the bananas were turning that lovely shade that signifies they should be baked with rather than eaten plain. I like my bananas slightly underripe so the thought of an overly ripe banana as a snack is slightly upsetting.
These muffins were tasty and only slightly adapted from Tyler Florence's recipe. I made half a batch and they fit perfectly in my mini muffin pan.
Ingredients:
1 cup all-purpose flour
3/4 tsp baking soda
pinch salt
2 overripe bananas
1/2 cup brown sugar
1 1/4 sticks butter melted and cooled
1 egg
1 tsp vanilla extract
1/2 cup pecans, chopped
Preheat your oven to 375 and spray the ish out of your muffin pan with cooking spray.
Mash your bananas and combine with sugar. Beat vigorously until well combined. Add the butter, egg and vanilla and beat again. Mix in flour, baking soda and salt until just combined. Fold in the nuts with a spatula. Scoop your batter into muffin cups and bake for 12ish minutes, until golden brown.
Adapted from Tyler Florence's Banana Nut Muffins
Sunday, October 20, 2013
Lemon Brownies
Ew... Lemon brownies? There is no cocoa in them, and therefore they are not brown, but they are the consistency of brownies so I don't really have a better name.
Does anybody know where those random recipes that pop up on facebook come from? That is where I found this recipe and it was like a little bit of magic fell from the facebook abyss. Lemon is one of my favorite flavors of almost everything. It goes on my list of things that you add to a dish that needs a little something extra (lemon, garlic, onion or avocado).
Ingredients
1/2 c butter
3/4 c flour
3/4 c sugar
1/4 tsp salt
2 eggs
2 tbsp lemon zest
2 tbsp lemon juice
Glaze
1 c powdered sugar
4 tbsp lemon juice
2 tbsp lemon zest
Preheat oven to 350 and grease an 8x8 pan.
Beat first 4 ingredients together in a large bowl, and whisk the next 3 ingredients together in a small bowl, and then add the small bowl to the large and beat until smooth. Pour into pan and bake for 23-25 minutes, edges should be golden brown and center solid but moist.
Whisk the glaze ingredients together (definitely use a whisk, a fork didn't do the job). When the brownies are done and completely cool, pour the glaze over the top. It should set up if left uncovered, and I love that. I love hardened icing.

These have a super-strong lemon flavor, it is not subtle at all. For me, they are absolutely delicious! I used the zest of two whole lemons between the brownie and the glaze, and I think it was about the right amount. I juiced the two lemons, intending the use it in the recipe and then proceeded to spill that fresh squeezed juice all over myself. I was pissed. So instead I used bottled lemon juice and it was just fine.
I really want to try these in both lime and orange and see if they are just as good. I think they might be. Then I could have rainbow brownies! Oooh... I am giving myself even more ideas!
Does anybody know where those random recipes that pop up on facebook come from? That is where I found this recipe and it was like a little bit of magic fell from the facebook abyss. Lemon is one of my favorite flavors of almost everything. It goes on my list of things that you add to a dish that needs a little something extra (lemon, garlic, onion or avocado).
Ingredients
1/2 c butter
3/4 c flour
3/4 c sugar
1/4 tsp salt
2 eggs
2 tbsp lemon zest
2 tbsp lemon juice
Glaze
1 c powdered sugar
4 tbsp lemon juice
2 tbsp lemon zest
Preheat oven to 350 and grease an 8x8 pan.
Beat first 4 ingredients together in a large bowl, and whisk the next 3 ingredients together in a small bowl, and then add the small bowl to the large and beat until smooth. Pour into pan and bake for 23-25 minutes, edges should be golden brown and center solid but moist.
Whisk the glaze ingredients together (definitely use a whisk, a fork didn't do the job). When the brownies are done and completely cool, pour the glaze over the top. It should set up if left uncovered, and I love that. I love hardened icing.

These have a super-strong lemon flavor, it is not subtle at all. For me, they are absolutely delicious! I used the zest of two whole lemons between the brownie and the glaze, and I think it was about the right amount. I juiced the two lemons, intending the use it in the recipe and then proceeded to spill that fresh squeezed juice all over myself. I was pissed. So instead I used bottled lemon juice and it was just fine.
I really want to try these in both lime and orange and see if they are just as good. I think they might be. Then I could have rainbow brownies! Oooh... I am giving myself even more ideas!
Saturday, October 12, 2013
Sauteed Chicken Pasta
This was a recipe born out of things I had around the house one weekend when I needed to make a meal, and it turned out to be easy and delicious. Growing up, we never ate pasta (and only ever spaghetti) without massive amounts of Prego on it. I do still have a nostalgic love for cheap pasta sauce with hamburger in it. Trying to get away from that, I like finding new stuff to put on pasta. Also, it feels kind of hamburger-helper-y, and I am, you know, fancier than that, ya'll.
Basics are:
Butter
Olive oil
Chopped garlic
Chopped tomato
Sliced mushrooms
Cubed/sliced chicken breast
Lemon juice
Salt/Pepper/Basil
Pasta
First, saute the garlic in butter and then add the chopped tomatoes. A few minutes later, add the mushrooms. Dredge the chicken in flour and add it to the pan after a little olive oil.


I love garlic and lemon together on pasta. I usually think pasta is pretty boring, but lemon and garlic make everything bright and tasty. It's not really anything revolutionary, but it is basic, has ingredients that are usually in the house, and tastes really good.
Also, this makes great leftovers. It seems like a lot of stuff I make isn't good on the second day. It gets mushy, or discolored or otherwise weird and unappetizing, but this is almost just as awesome reheated!
Basics are:
Butter
Olive oil
Chopped garlic
Chopped tomato
Sliced mushrooms
Cubed/sliced chicken breast
Lemon juice
Salt/Pepper/Basil
Pasta
First, saute the garlic in butter and then add the chopped tomatoes. A few minutes later, add the mushrooms. Dredge the chicken in flour and add it to the pan after a little olive oil.

Start water boiling for your pasta, and get it cooking at the same time. I like angel hair, but in this instance, pretty much anything you like will work.
Cook the chicken through, then add some more olive oil, lemon juice, and the salt, pepper and basil to taste. I try to make sure there is enough liquid to make it a tad saucy, and then throw in your cooked pasta and toss together!

Also, this makes great leftovers. It seems like a lot of stuff I make isn't good on the second day. It gets mushy, or discolored or otherwise weird and unappetizing, but this is almost just as awesome reheated!
Subscribe to:
Posts (Atom)