Thursday, March 14, 2013

Spicy Orange Stir Fry Sauce

I have a bit of a condiment and sauce obsession. If I could have a bunch of little bowls of dipping sauces at each meal I would be so very happy. The only problem is that sauces that you buy at the store usually seem to suck. Especially Asian sauces. Unless you are buying something basic like soy sauce, the amount of interpretation is so great from brand to brand that none of them seem right. I have been making stir fry with these sauces forever. I have even tried mixing different sauces and it still sucked.

So today I decided to make my own stir fry sauce. I wanted something sweet and spicy and simple. The base of this sauce is orange juice. I zested and juiced a couple oranges. I bought a zester, and dang it, I am going to use the crap out of it!


I added some orange juice from the bottle too, just because I needed more, and it didn't seem to hurt anything. Then I added a couple tablespoons of soy sauce, a couple tablespoons of sugar and about 1/2 a teaspoon of crushed red pepper flakes. That's it! Then I reduced it by half or more, until it was a little caramelized.


I left it simmering while I worked on the stir fry. I used shrimp and some frozen vegetables (bell peppers, snap peas, onions and edamame), but I am sure you could use whatever you like in your stir fry.


I cooked the shrimp through and warmed the already thawed veggies. Then I just poured on the sauce and cooked until the sauce was the consistency I wanted, and coated everything. Serve over rice, and TA DA!


Magic in a bowl! Those 4 simple things made the best stir fry sauce I have had in a long time. I may just throw out some of the crappy sauces that have been hiding out in the fridge for years. The red pepper flakes weren't overpoweringly hot, and the orange juice was the perfect vehicle for sweet and spicy. Obviously this is not an entirely original flavor, but it was so much better than a bottle. Paul Newman, you can suck it!

Monday, March 11, 2013

Fancy Filled Chocolates

Looking back over our posts so far I have noticed that Sarah has recipes... and I have jumbles of ingredients where the amounts don't actually matter. I swear I do cook things with recipes, I just haven't made a whole lot of those lately. And this one is no different!

Last Christmas I got a big idea to make fancy chocolates for everyone on my list. I had been buying expensive Christopher Elbow and other kinds of chocolates, which are fabulous but the fillings sometimes were weird, and I kept thinking up stuff that I thought sounded better. So I started a list of things like apple spice rum raisin, passion fruit praline and lime curd with toasted coconut. And you know what? They all turned out awesome!

This time I stuck with 2 fillings because I wasn't planning an array of gifts. I brought back one filling that I had done over Christmas, Nutella and caramel, which was a total hit. And I wanted to try something new, and I had some leftover ganache from the bark recipe that I wanted to spice up, so I went with lime chocolate ganache.

I had all of the fillings ready before I started melting the chocolate. I used Nutella straight from the can, and put it in an icing bag so I could pipe it into the molds easily. For the caramel, I used the old standby of melting some caramels with evaporated milk, but any caramel you like that is runny enough to pour or pipe would work.

The ganache was your standard dark chocolate and cream/milk, and then I reduced the zest and juice of 3 limes with a little sugar, and then stirred it in to the still warm ganache. The ganache started out really thick and firm. Surprisingly, the ganache smoothed out quite nicely in the microwave in 30 second increments.

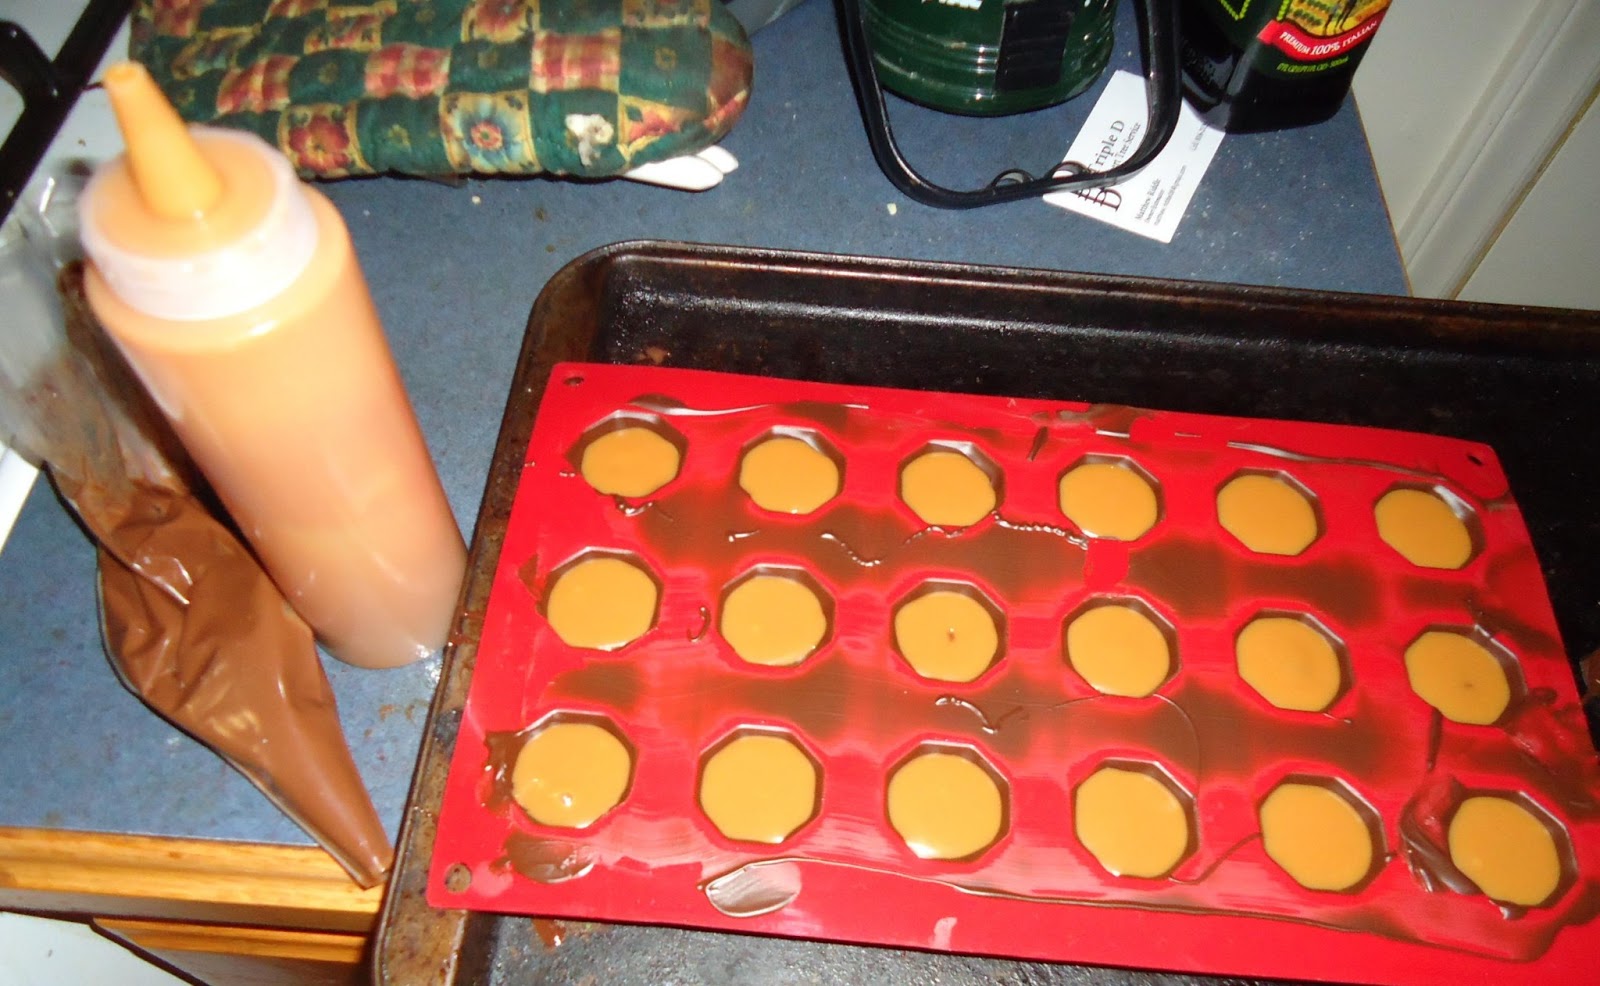
Next comes melting the chocolate to pour into the mold. Thanks to Brian for getting me these awesome  silicone molds for Christmas! I have tried the cheap all-plastic ones, and they are ok, but I tended to crush the plastic in the process of removing the chocolates.


Tempering the chocolate is a good idea because it will give the chocolate a satisfying snap when it hardens. Here is a detailed set of tempering instructions. I was lazy this time and did my no-thermometer version, where I just heat the chocolate slightly hotter than melting point, cool it for a bit and then put it back on the heat. It worked just as well, so it seems the that exact temperatures aren't all that important. Of course, all of this is done with a make-shift double boiler because it will help you not burn the chocolate. Dark chocolate seems to be the easiest thing to work with, but milk and white chocolate are doable too.

There are lots of ways to get the chocolate into the mold... you can pour it all over and shake it out, paint it in very carefully, but I go with a sort of in-between method of spooning some into each well and then shaking it around and using a (very clean) finger or toothpick to make sure all of the edges are covered and then shaking the excess out. Then I use a metal scraper to scoop all of the excess chocolate off the top of the mold. I find it to be a nice balance of making a giant mess while still being detail-oriented.


After coating the molds with chocolate I stick them in the freezer for about 10-15 minutes so they harden up nicely and are ready for the filling. Keep an eye on your melting chocolate, or take it off the boiler while you wait so it doesn't burn. Once hard, you can pipe, pour, funnel, spoon, smoosh, etc. your filling into the coated molds. I piped the Nutella, used a squeeze bottle for the caramel, and spooned in the ganache and they all worked just fine. Make sure your fillings are level-ish, and slightly below the threshold of the mold so that you have room to cover the bottom of the chocolates. I found the scraper was great for spreading the chocolate over the mold so they have flat bottoms (preferred in this case).

After everything is assembled, stick them back in the freezer or fridge to finish setting them up. The silicone molds made it super-easy to unmold the chocolates because the mold just turned inside out and dropped the chocolates right out! I didn't have to bang them on the table and whack them with kitchen appliances to free them like with the plastic molds.


I mixed in some white chocolate at one point to get that marbled effect, but it is hard to keep consistent because everything just starts turning medium brown after a while. Whatever the color, I haven't hit a bad one yet, chocolate with fun filling is always a crowd-pleaser.

Two things though, plan on making a huge mess of your kitchen, your hands and your clothes, and plan on spending several to many hours depending on the number of trays and different fillings, because even on take-two, I spent 5 hours! I recommend getting creative with the fillings, I feel like that is the most fun part. Next time... maybe squid and mustard!

Pineapple Cobbler

Living in the South has opened me up to a whole new realm of food.  Some of the Paula Deen buttery cliche is true but most of it is just new flavors and new dishes.  I went to an ultimate tournament in November and the tournament organizers include a massive Thanksgiving potluck in your tournament fee so I got to eat some new and delicious food.  The tricky thing about eating after playing in a tournament is that you're so tired and hungry that pretty much everything is the best thing you've ever eaten.  That being said, one dish in particular struck a chord with me.  It was a pineapple cobbler.

Now I've had dump cake before and pineapple cobbler is it's more subtle cousin.  This cobbler is lightly sweetened and the topping is almost pancakey. We finished it in 2 days because every time we walked by, we'd have to swipe a bite or two.  It's that good.


I found this recipe on Southern Plate via Google and the only adjustment I made was to decrease the sugar in the topping and add a bit of salt.

Ingredients:

Filling:
20 oz can pineapple chunks
4 tbsp butter
1/4 cup AP flour
1/8 cup brown sugar

Topping:
1 cup baking mix
1/4 cup brown sugar
1/2 cup milk
pinch salt

Put butter, juice from pineapple, brown sugar and flour in a saucepan.  Whisk over medium heat until butter is melted and you reach a uniformly smooth consistency.  Bring ingredients to a simmer while still whisking.  It'll start to look like pineapple gravy, which sounds weird but is amahzing!  Remove your pan from the heat and stir in the pineapple chunks with a spoon or spatula.  Don't try to whisk it.  Pour your filling into a well Pam-ed 9x9 pan.

Mix baking mix and sugar and salt together.  Add milk and stir until well-combined.  I used my quick bread rationale and didn't go too smooth but tried to get everything well incorporated.  Pour the topping over the filling and smooth it out.  Bake at 400 for about 20 minutes.  It should get all golden-y brown and you'll see a little of the filling bubbling around the edges.

Recipe very slightly adapted from Southern Plate

Monday, March 4, 2013

Oven Fajitas

I got a Pinterest account some time ago and I can't decide what I think of it.  I use it, I actively pin things and look at things others have pinned but I mostly use it as a place to bookmark things I want to try.  The hard part is actually trying the things I've pinned.  I realized after I made these fajitas that I hadn't actually pinned them, I'd just seen the pin going 'round and 'round Pinterest.  This recipe comes from Budget Bytes, which is one of my go-to blogs for tasty dishes that don't require 2 hours of prep/cooking.

You've got to make the homemade fajita seasoning.  I don't like the storebought ones because they're way too salty.  This seasoning has just a touch of salt and I think the flavor is perfect.

Overall, I really enjoyed the fajitas.  The meat was cooked perfectly and I want to use this same method for all my chicken dishes from now on.  Some of the peppers got a little softer than I usually like but that won't prevent me from making this again.  I also wonder how it would taste with shrimp.


Ingredients:

Fajita Seasoning
1 tbsp chili powder
1/2 tbsp paprika
1/2 tsp onion powder
1/2 tsp garlic powder
1/4 tsp cumin
1/8 tsp cayenne pepper
1 tsp sugar
1/2 tsp salt
1/2 tbsp corn starch

Fajitas
2 bell peppers seeded and cut into strips
1 1/2 onions cut into strips
1 1/4 lbs chicken breast cut into strips
2 tbsp vegetable oil

Preheat your oven to 400.  Mix the seasoning ingredients together in a small bowl and set aside.  Combine cut up peppers, onions and chicken in a 9x13 pan.  Sprinkle the seasoning evenly over the ingredients in the pan.  Drizzle oil over the seasoned goodies and then mix with your hands to evenly distribute seasoning and oil.  Bake for 40 minutes, stirring really well once about halfway through.

Recipe from Budget Bytes

Saturday, March 2, 2013

Everything Bark

I had a bunch of different kinds of chocolate lying around so I decided on a cleaning-out-the-cabinets dessert. What better than chocolate bark which can literally consist of anything! Here is what I had in the house:

Dark chocolate
Milk chocolate
White chocolate
Slivered almonds
Chopped walnuts
Pretzels
Cornflakes
Rice crispies
Craisins
Golden raisins
Malted milk balls (not pictured)

I plumped the raisins and craisins in hot water first. Then I melted the chocolate. Usually I will use a double boiler, but I was feeling a little lazy so this time I just threw all of the chocolate together in a pot and heated it on low. I haven't had a problem doing it this way, but you have to keep a close eye. After the chocolate was mostly melted, I dumped everything else in and stirred it all up, then dumped it out on a baking sheet when it was all coated. I left a little of the white chocolate out and melted it at the end to drizzle on the top.


Put it in the fridge or freezer until it sets up and then chop it up into little hand-held blocks of goodness.


Really, this is a no-lose recipe. As long as you are putting good stuff in, you will get good stuff out. Just don't burn the chocolate. Also, don't try to make ganache, it gets too thick for stirring stuff into, just stick with straight up chocolate.

Friday, March 1, 2013

Almost Chipotle's Corn Salsa

I remember when Chipotle first came to my hometown.  They were across the street and a few doors down from my dad's office so when I would work for him after school, he would sometimes send me over there to get us a nosh.  And by nosh he meant a burrito.  Each.  I miss working for him.

When I saw this recipe, I was super excited to try it out at home because I love their corn salsa.  Sadly, my cilantro was looking a little lackluster so I left it out and thusly, my salsa was a little lackluster.  I want to try it again with some fresh and crisp cilantro though, so I found it blog-worthy.

This was also my first time chopping fresh jalapenos.  When people advise you to wear gloves, take them seriously!  I somehow got some jalapeno essence under my nose and damn, it burned for a couple of hours.

The recipe below doesn't include cilantro since that's the way I made it. This is the after photo from us munching on it with chips and adding it to our salads.  Also, I used way too big a bowl because my spatial abilities are lacking when it comes to figuring out what size vessel to use.


Ingredients:

12 oz bag of frozen corn, defrosted and drained
2 jalapenos, seeded and chopped
1/2 red onion
1/4 lime juice
3/4 tsp salt
1/2 tsp pepper

Mix ingredients together in a mediumish bowl.  Add more salt, pepper, lime to taste.

Recipe from How Sweet It Is